There are many ways that a guitar neck can be attached to a guitar body. For classical guitars, the Spanish Heel is the traditional method. There is also a bolt attached mortise and tenon method. I’ve used both of these multiple times in the past, but the method I prefer is to attach the neck using a spline. This method allows a large head block to be glued solidly to all four body pieces (top, back, side, side) which makes this joint super solid. Spanish heel is glued to the top and back, but usually not to the sides making that a less rigid method of building.
The spline method allows the maker to make the body separate from the neck and join them together late in the design process. This method was introduced into the United States by Richard Brune and Robert Ruck who saw this method in use on a trip to a Japan guitar factory in the 1970s. It has been used by both of them ever since, and it is also the method used by Marshall Brune, Peter Oberg, Aaron Green, and of course myself. There are probably others, but those are the ones I know about.
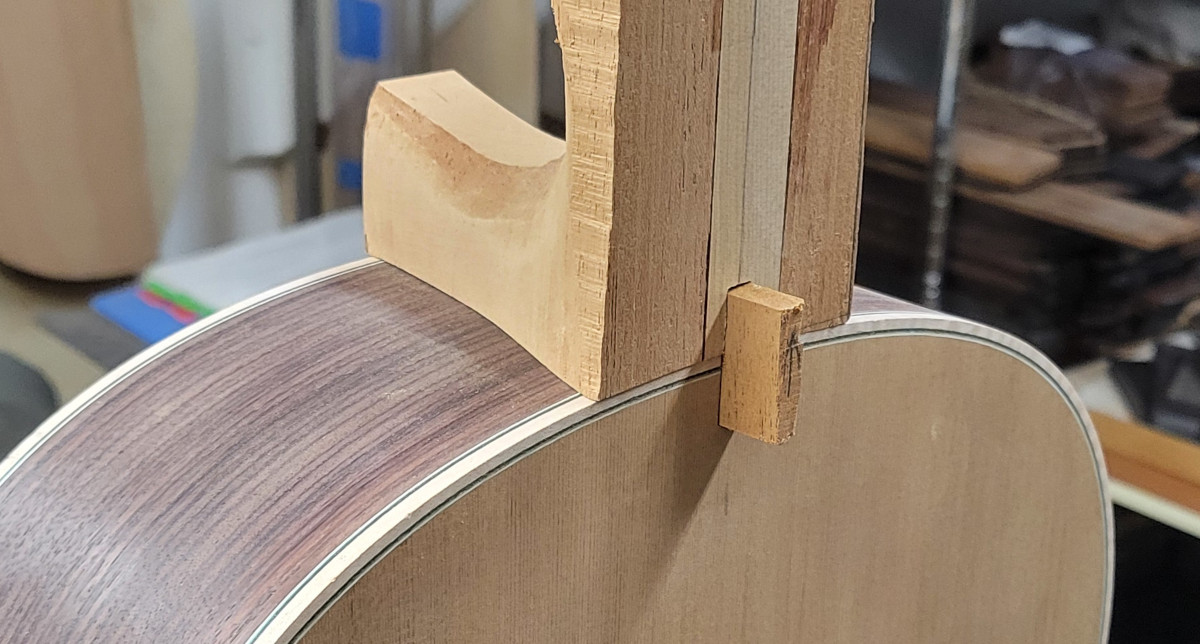
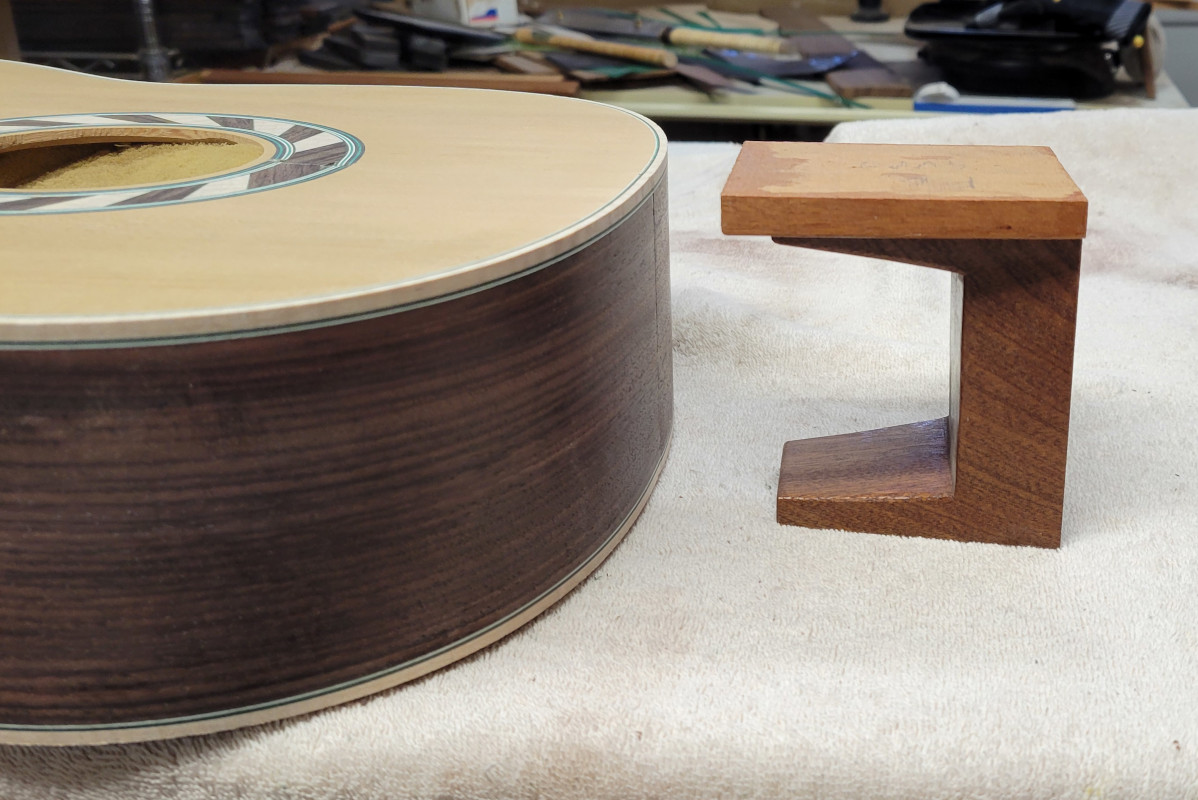
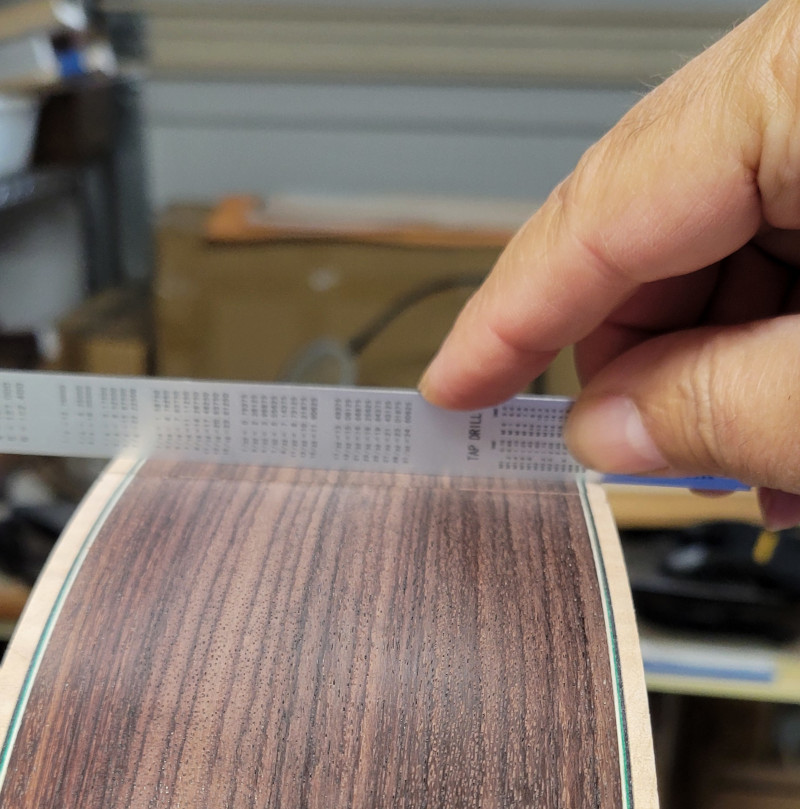
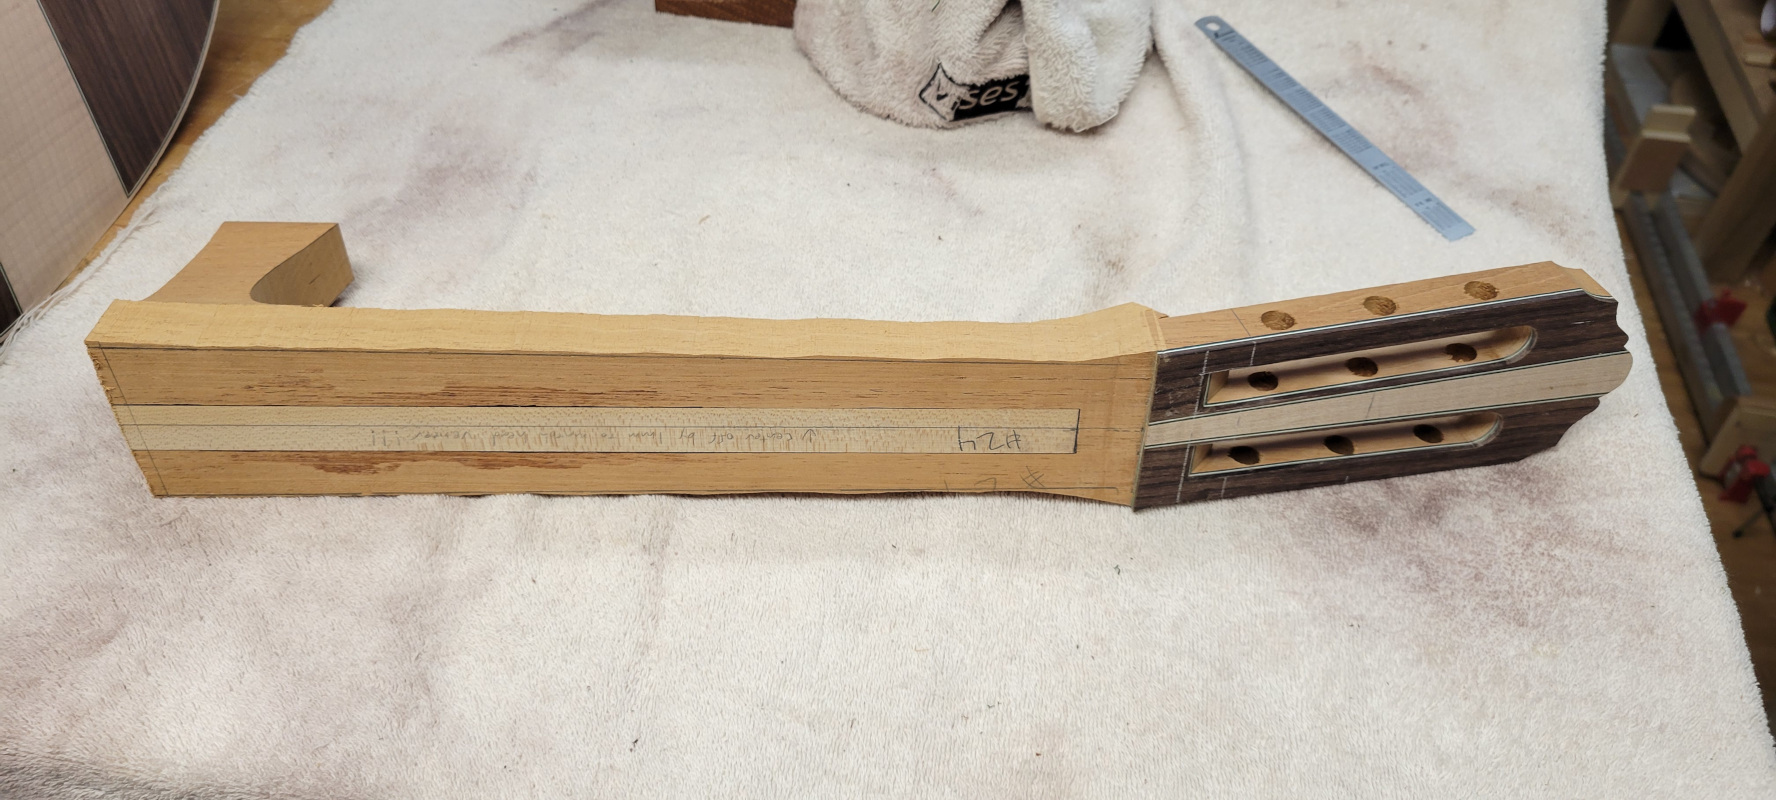
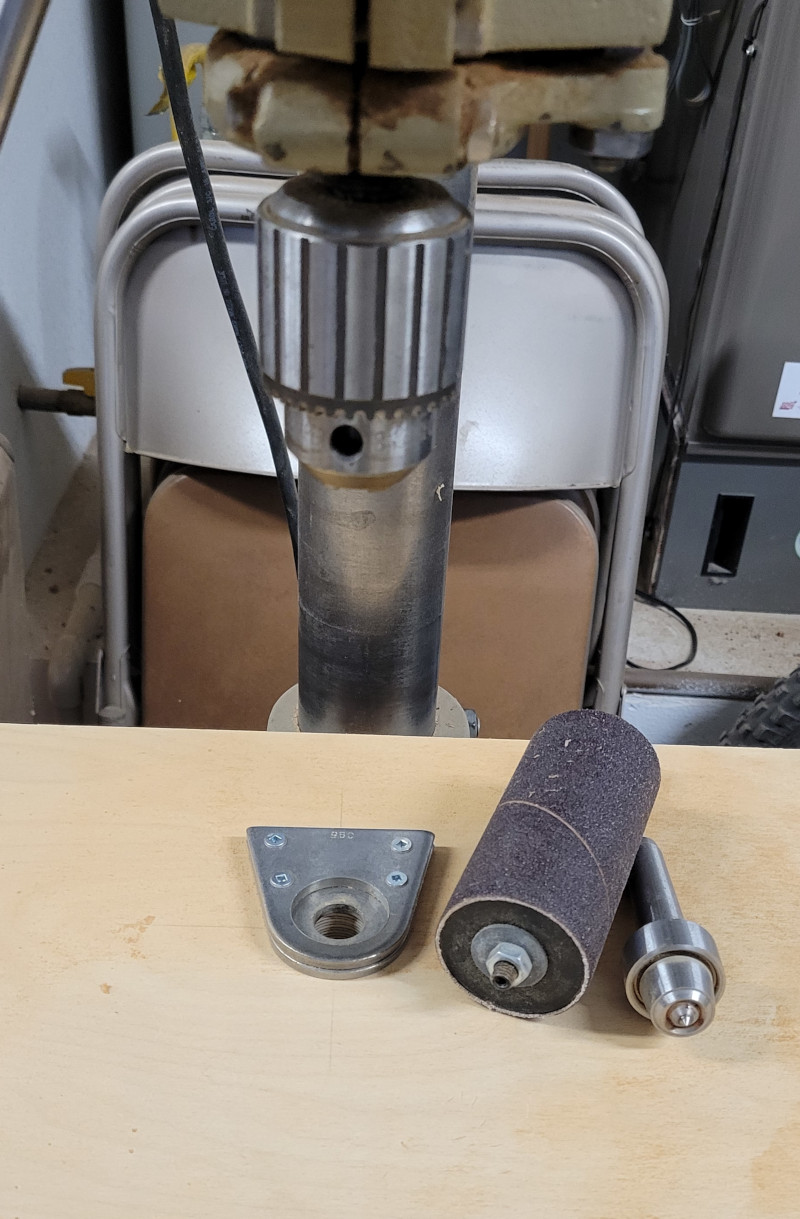
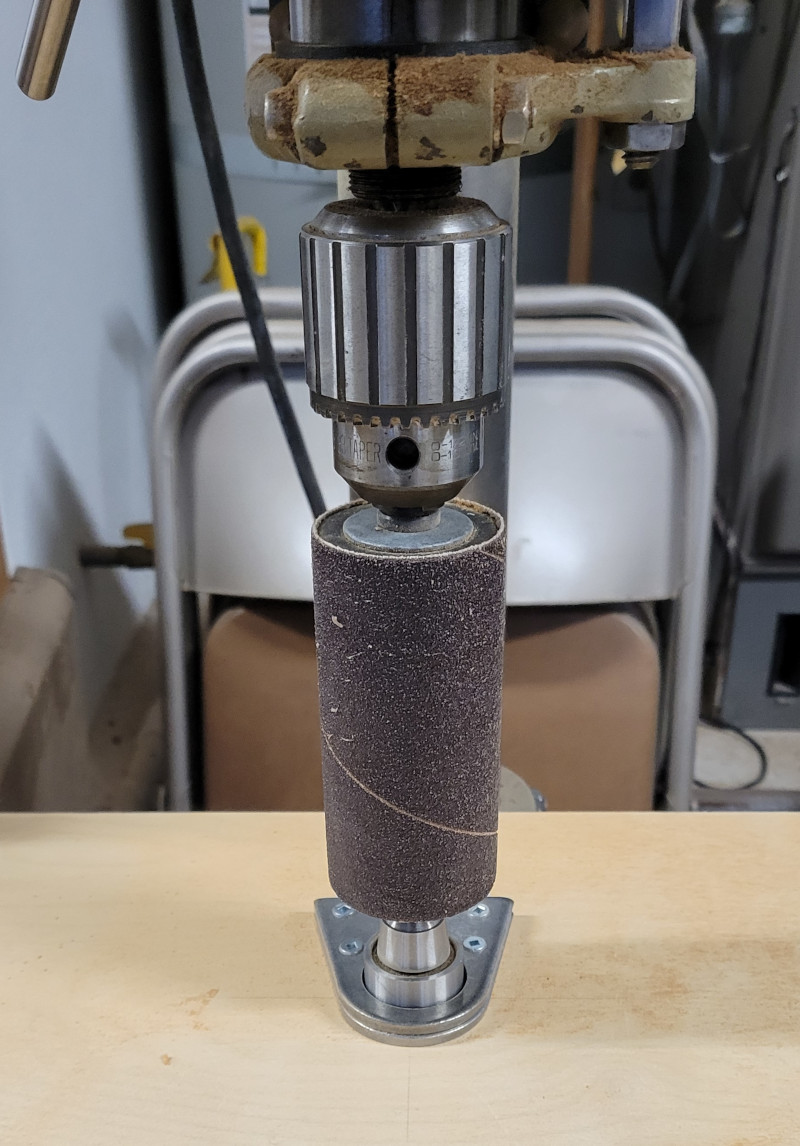
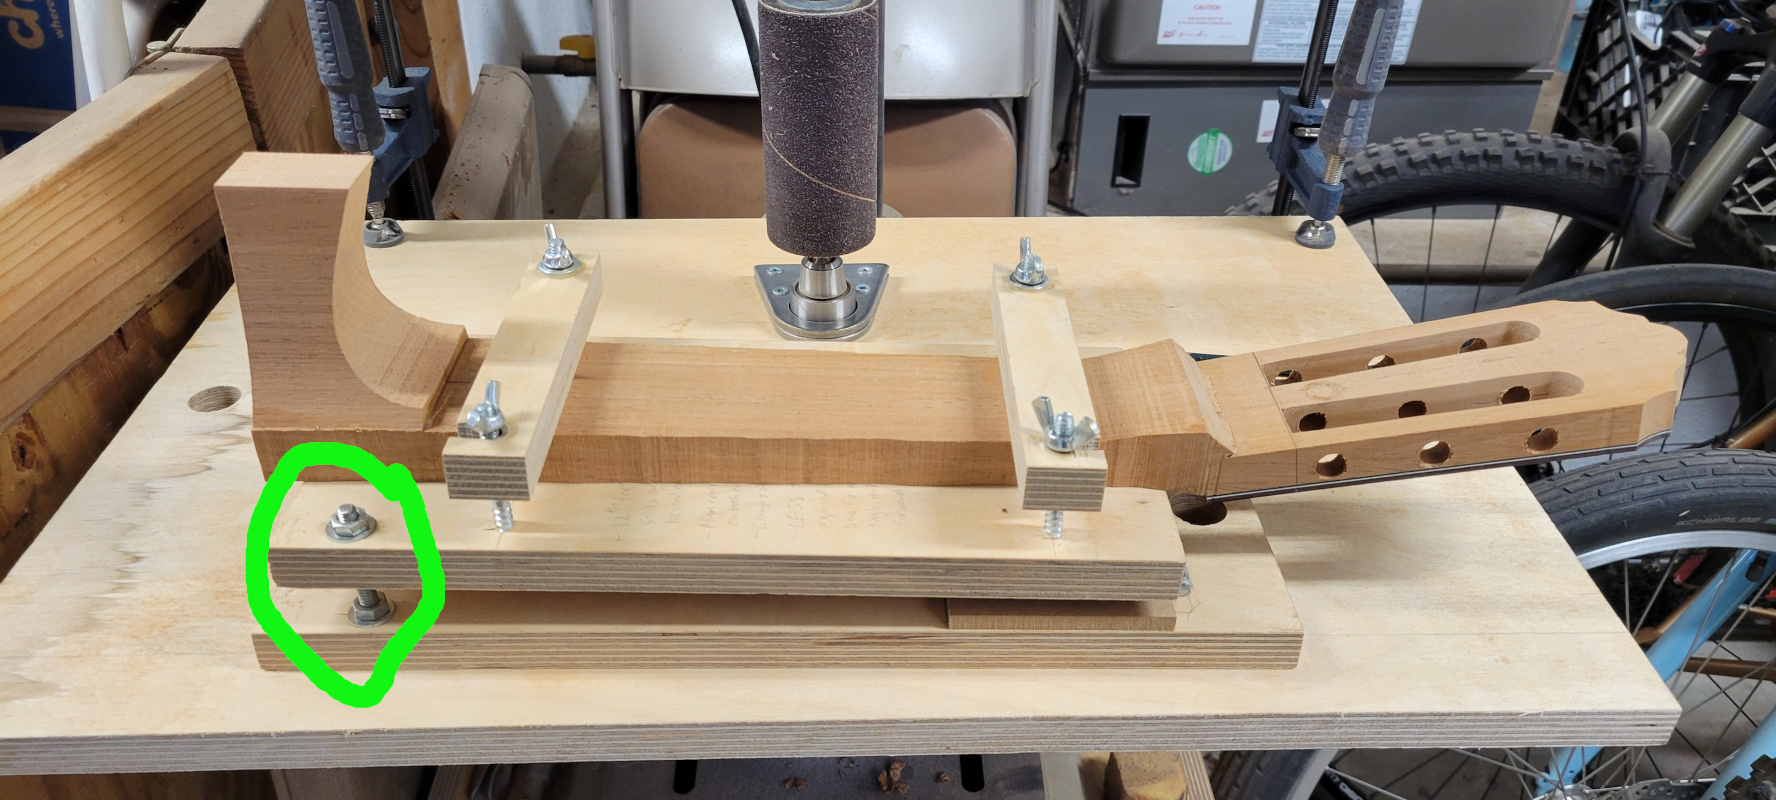
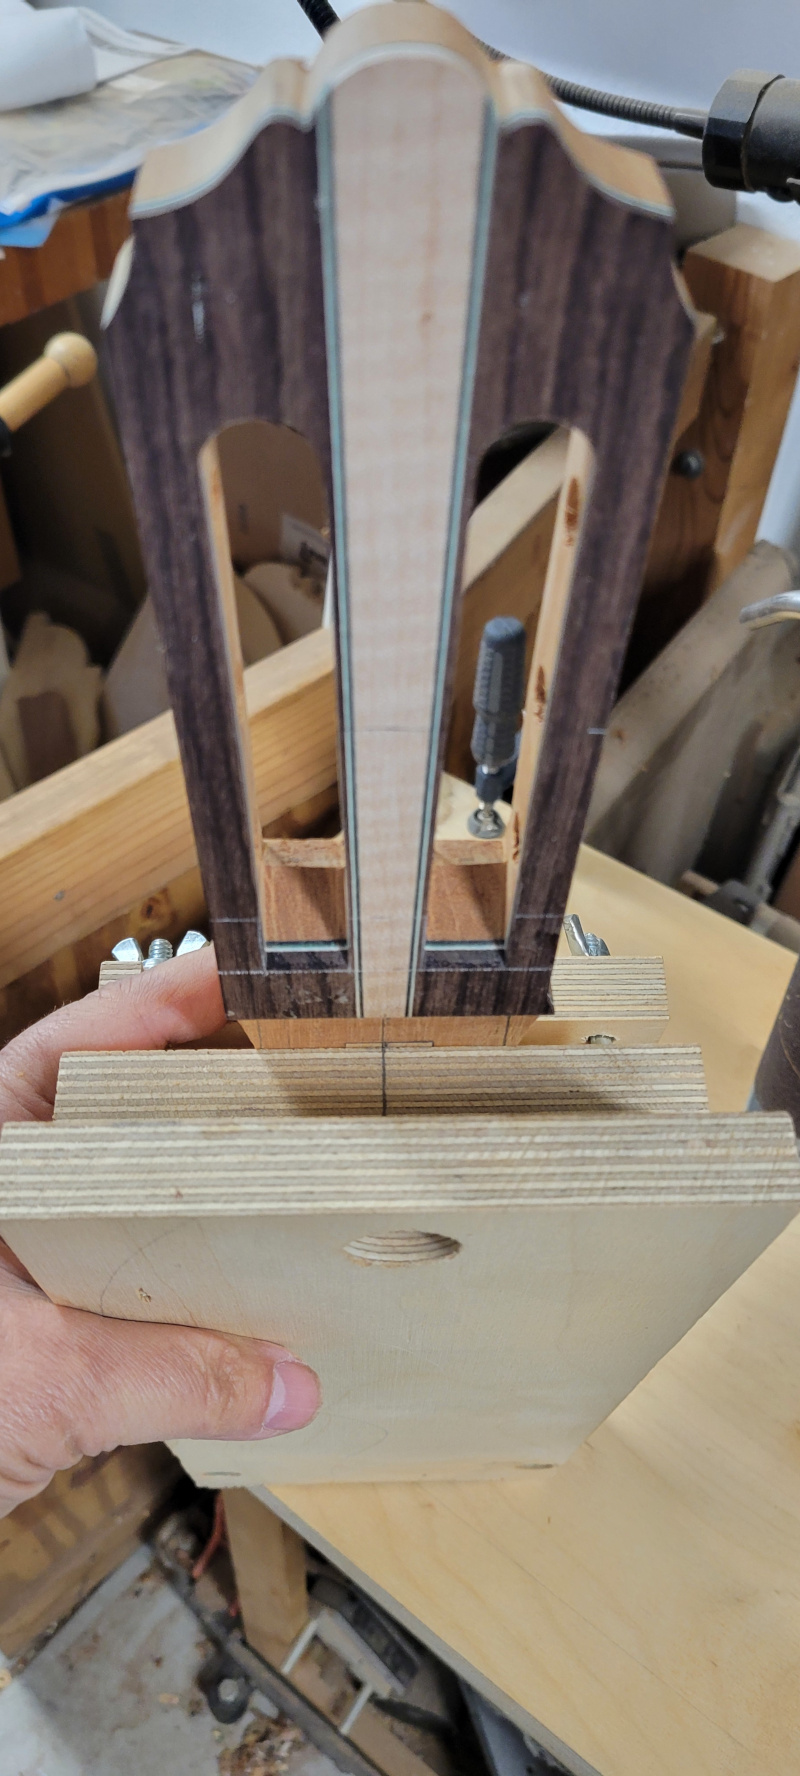
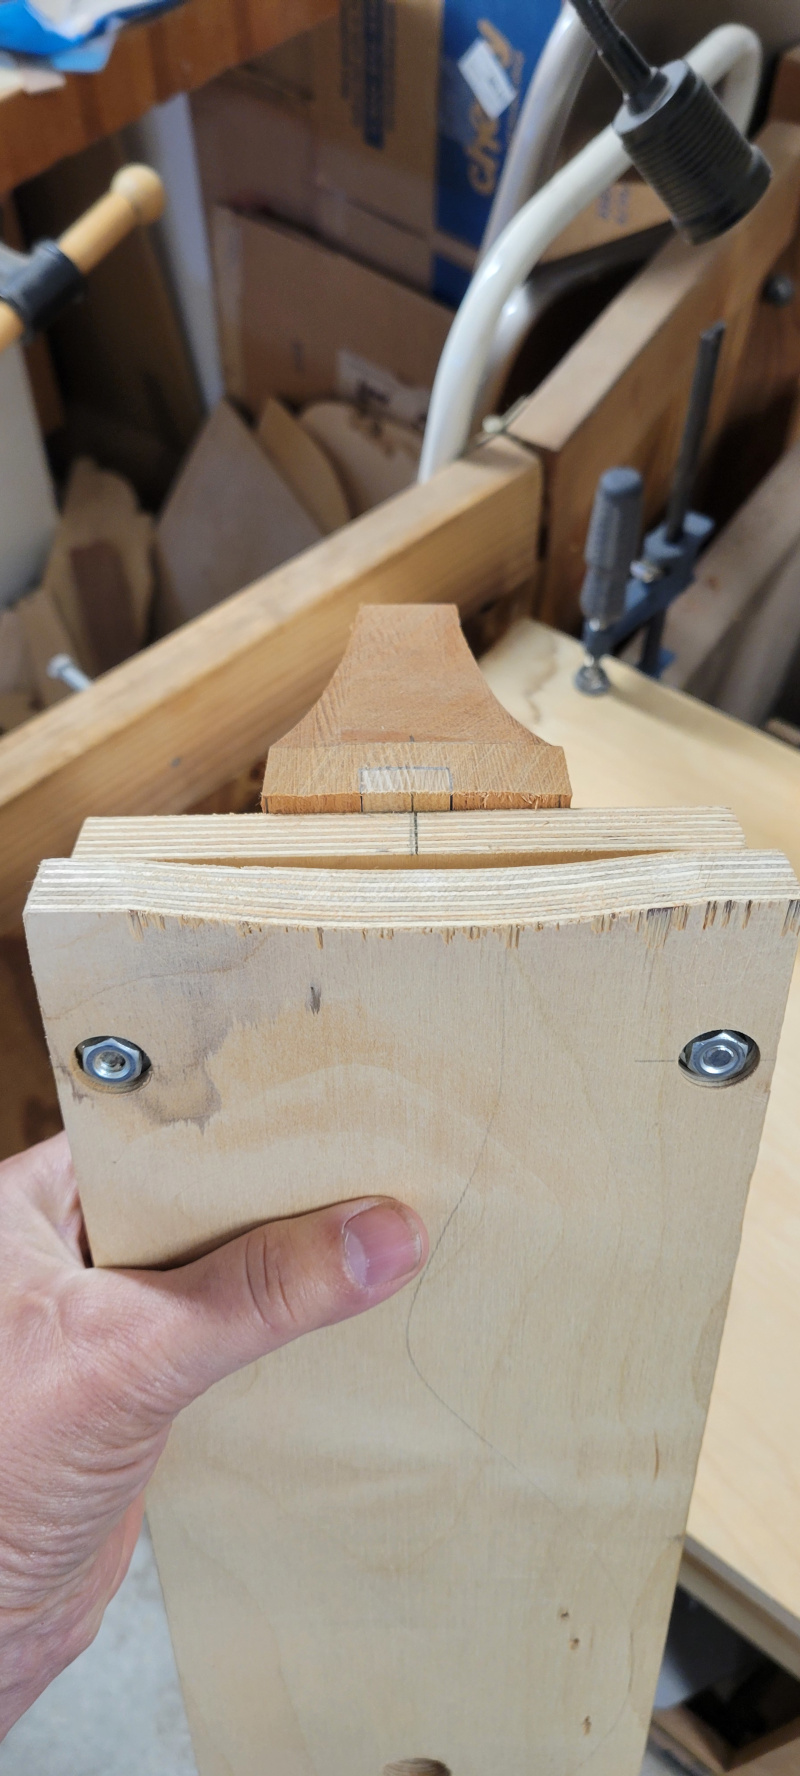
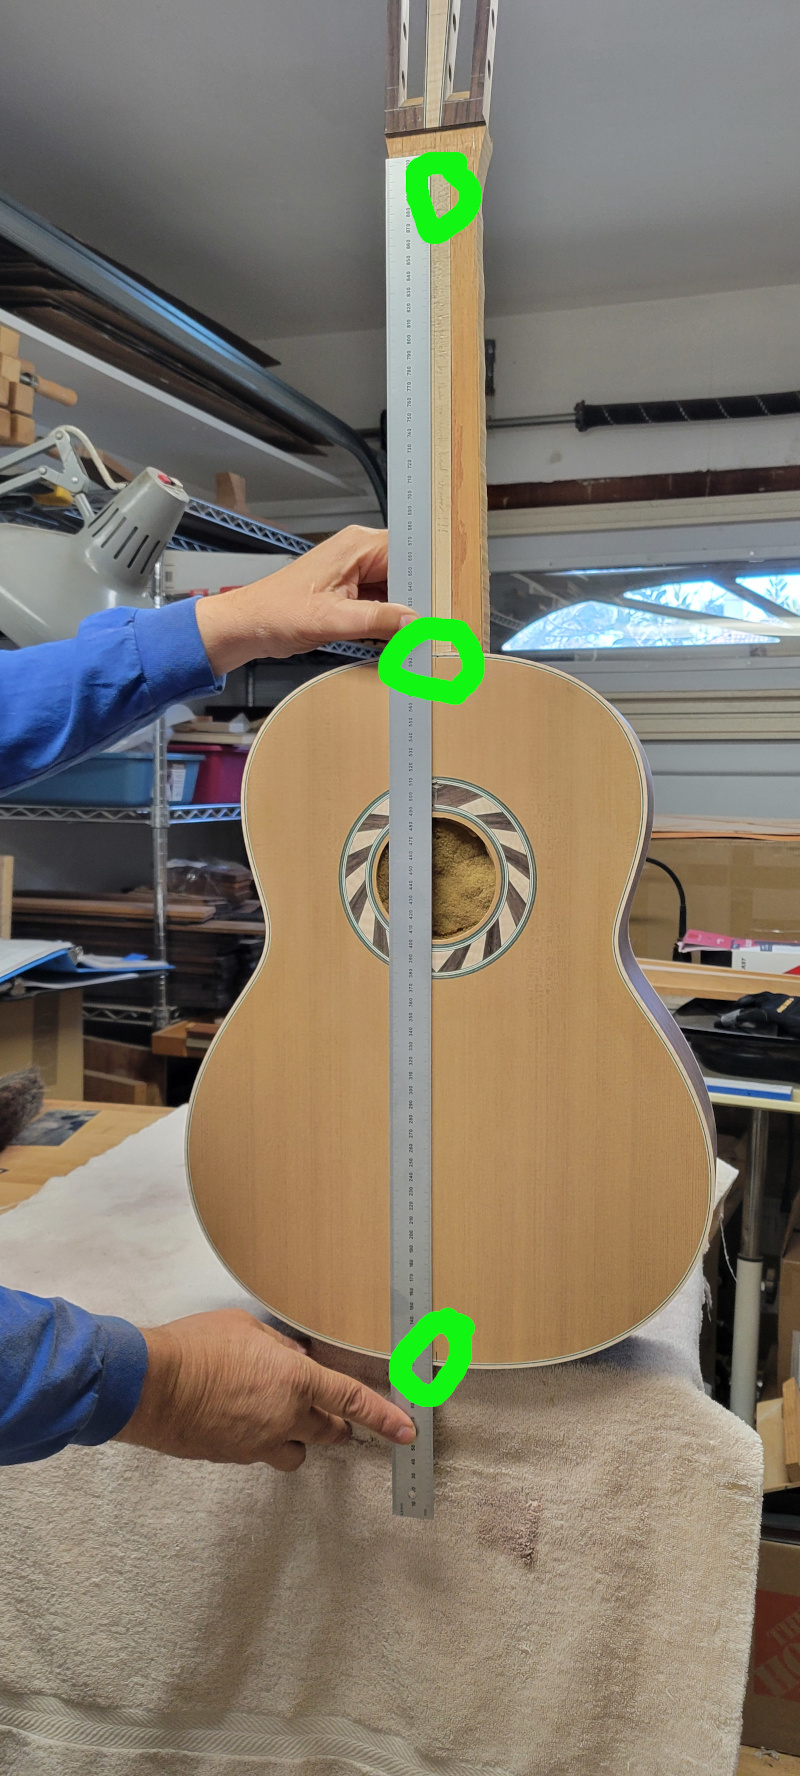
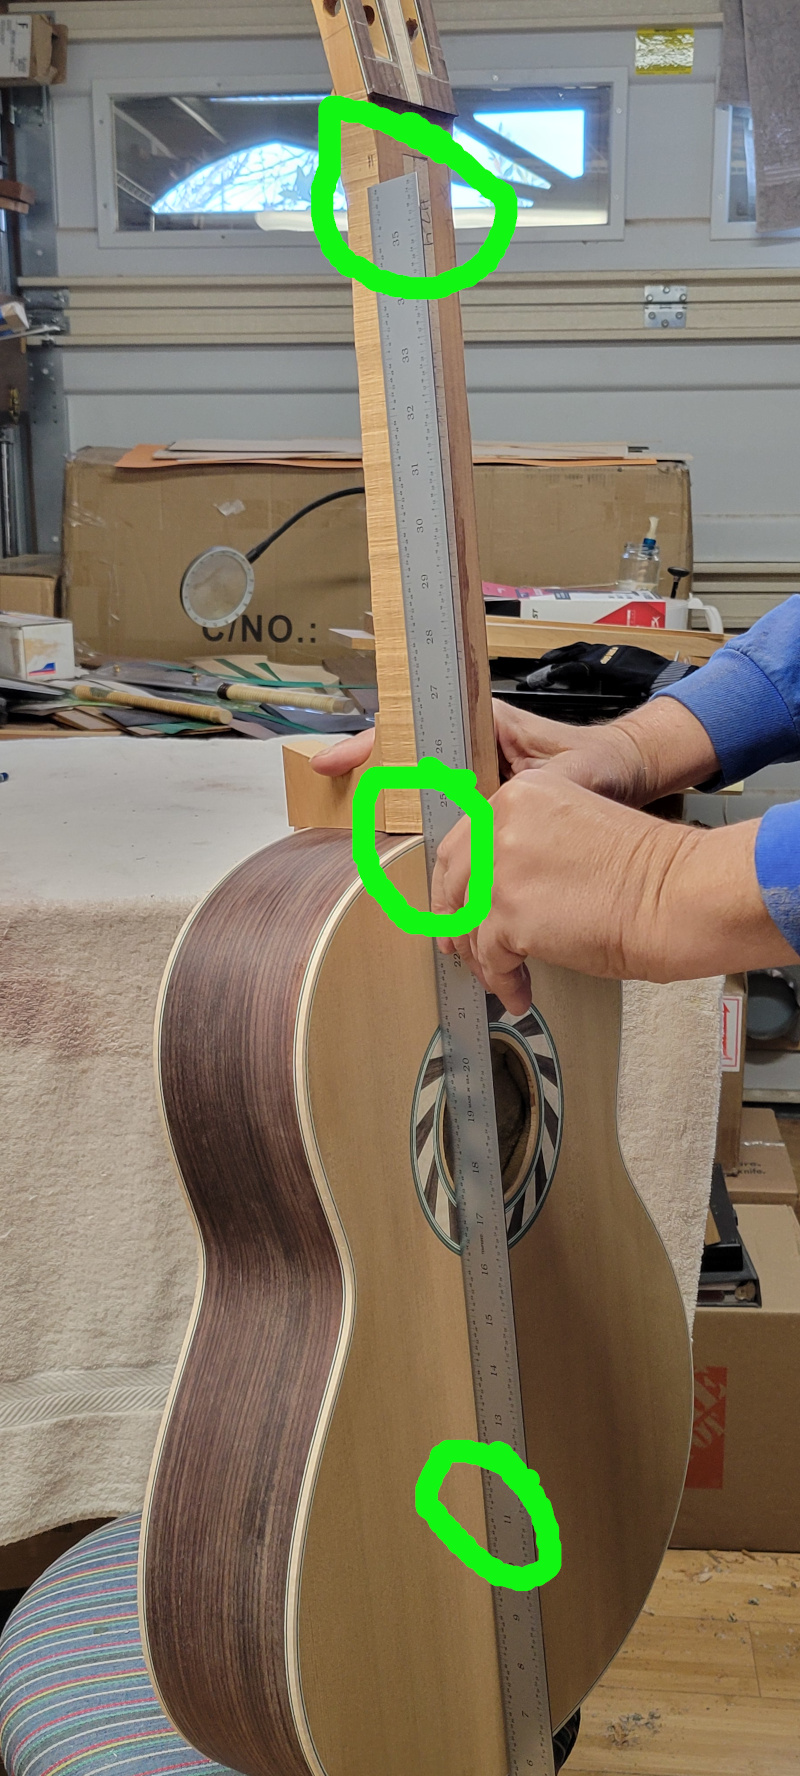
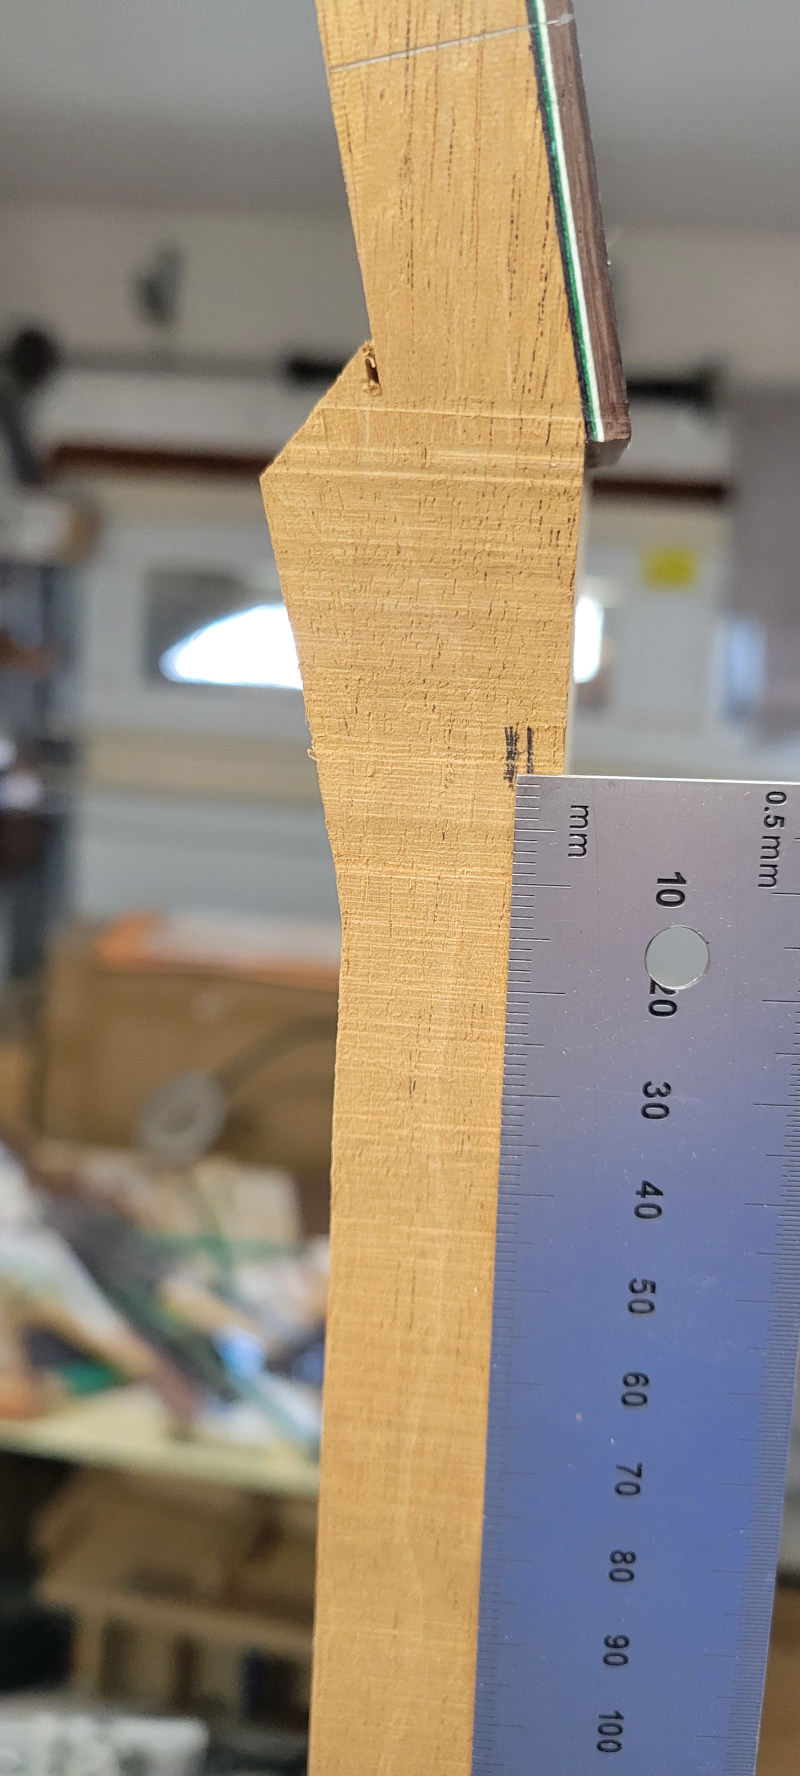
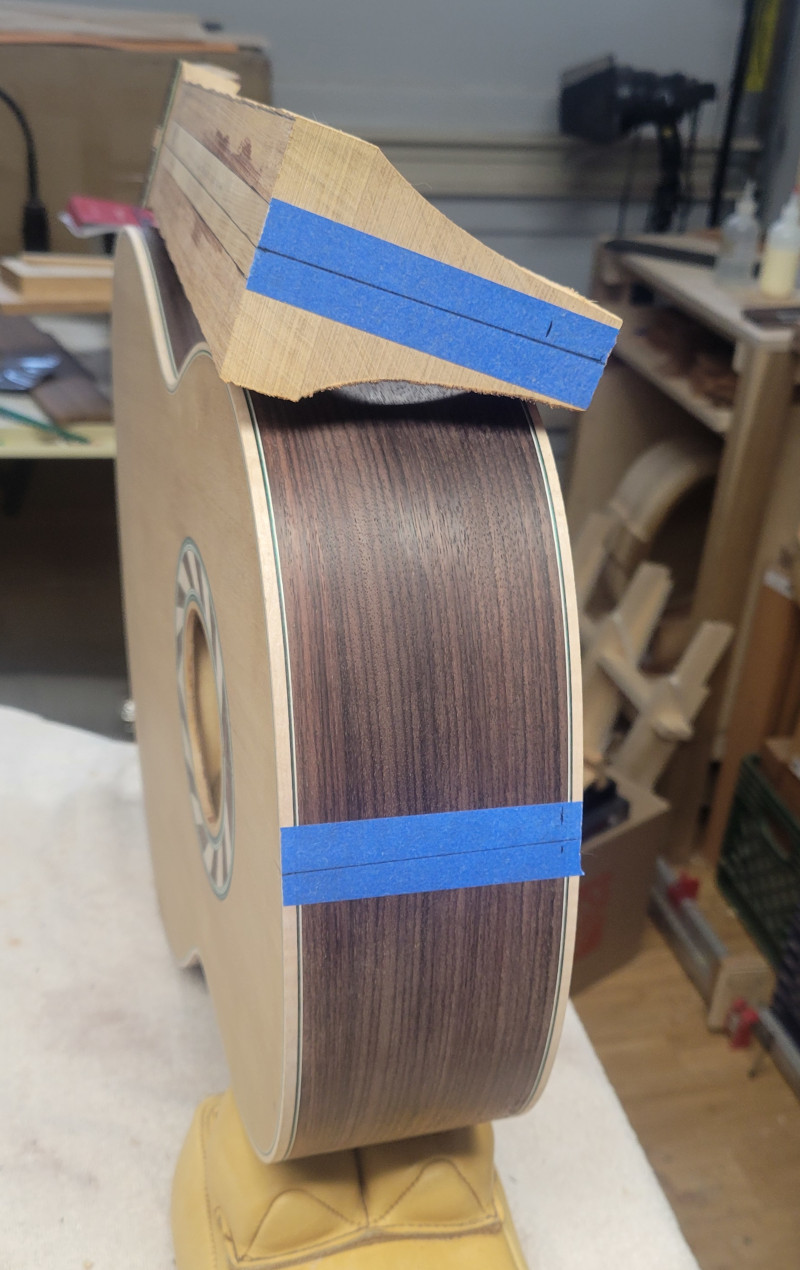
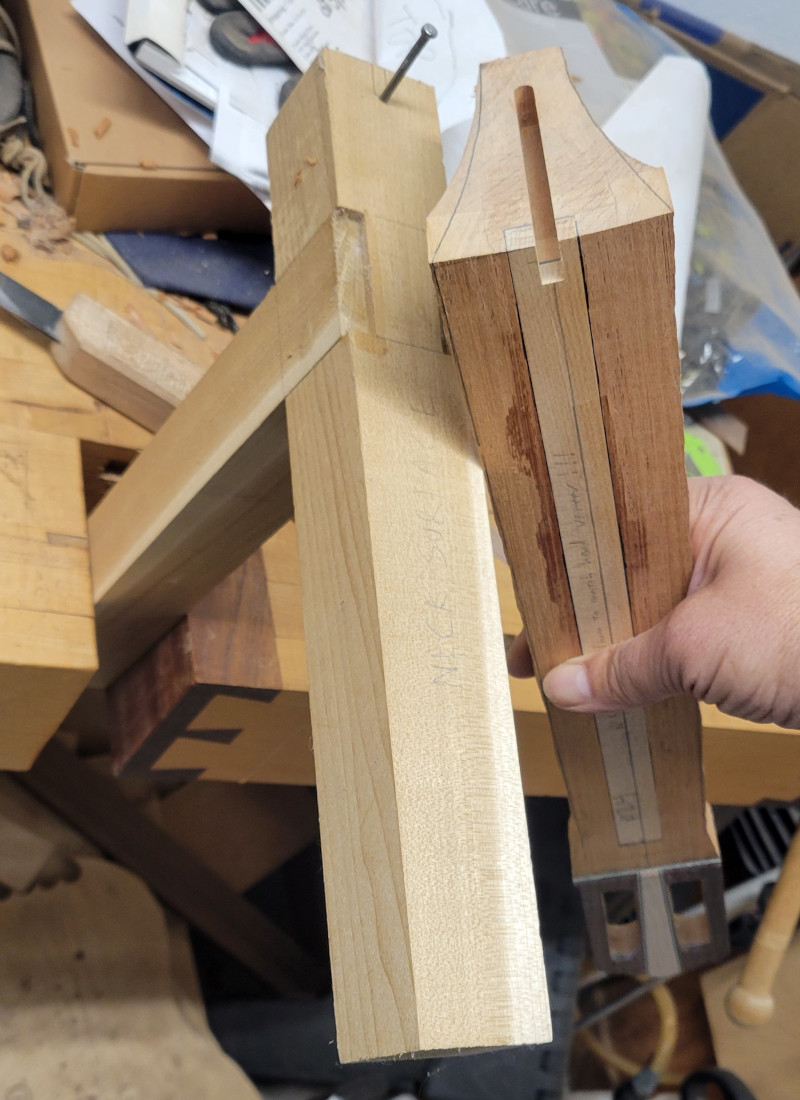
The build starts inside the body. A solid Mahogany head block with a wide fingerboard support block is used. This block is a full 1″ deep into the inside of the guitar so that there is plenty of wood to route out for attaching the neck via a spline. A sample block is shown next to a completed guitar body which contains this on the inside.The body face should be perfectly flat with no bumps or ripples for the entire area that will be glued to the neck. Sand this surface backed with hard block to get perfectly flat across the curved head area.This is the assembled neck. The head is fully formed, and a stiffener of hard maple is inlayed into the center of the neck. The heel is rough shaped and glued to the neck. The end that will attach to the body is about a 1/4″ too long and will be modified later.I use a drill press for shaping the heel of the neck so that it mates to the curvature of the guitar body. A work board is clamped to the drill press table that has a metal tab which holds a lathe live center. The live center will help the drill chuck take the side load so that the drill chuck is not overworked. Nothing worse than having your drill chuck pop off during an operation. The drum sander is a 2″ diameter by 4″ long drum off of a spindle sander which happens to have a convenient hole in the middle of the center bolt. This hole will go on the point of the live center to take all the side load from the drill press.This is the full assembly mounted on the drill press. The metal bracket at the bottom is the reference rub plate that will be used in the next jig to shape the neck heel.This is the sled that holds the neck stable during heel shaping. The bolt and nuts circled in green are the adjustment for the neck angle. It is crucial for neck action to get this dialed in perfectly so that the desired neck angle points perfectly towards the bridge.On the head end of the neck, align the centerline of the jig to the centerline of the neckOn the heel end of the neck align the centerline of the neck to the centerline on the jig. You can see that the jig has a carved out shape that matches with the shape of the head end of the guitar body. This is what rubs against the metal tabs around the live center on the drill press. I also designed this so that 1/4″ of reveal on the neck is perfect for dialing in the 12th fret line to the body of the guitar.First sanding pass. Sand just enough so you can test fit the heel to the body for testing proper alignment.Test alignment along both axes. The centerline of the neck should point directly to the centerline marked on the tail of the guitar when everything is aligned at the head end of the guitar. If this needs modification, slide the heel end of the neck a bit sideways in the sanding jig to change the sanded profile slightly.The slope angle is more tricky. For my guitars with the amount of belly I build into the top, and given the final thickness of the fingerboard, I want the neck to pitch forwards about 4mm. I mark near the head 3mm and 5mm from the fingerboard surface and aim for in between those marks. The ruler is touching the body on the belly and also on the head end next to the neck.Here’s a close up of the neck angle seen at the head end of the guitar.This is the goal. The neck heel closely matches the body shape, both alignments above are perfect, and the 12th fret line just touches or is broken by the body. Further sanding will shape this perfectly, bringing it a bit closer to the body.
As an aside.. if you have the space for a huge dedicated machine, Marshall Brune demonstrates his neck sanding machine in the following video. It makes the entire operation so much more automatic. I don’t have the space for a dedicated machine like this, hence I use a much more manual approach using a drill press.
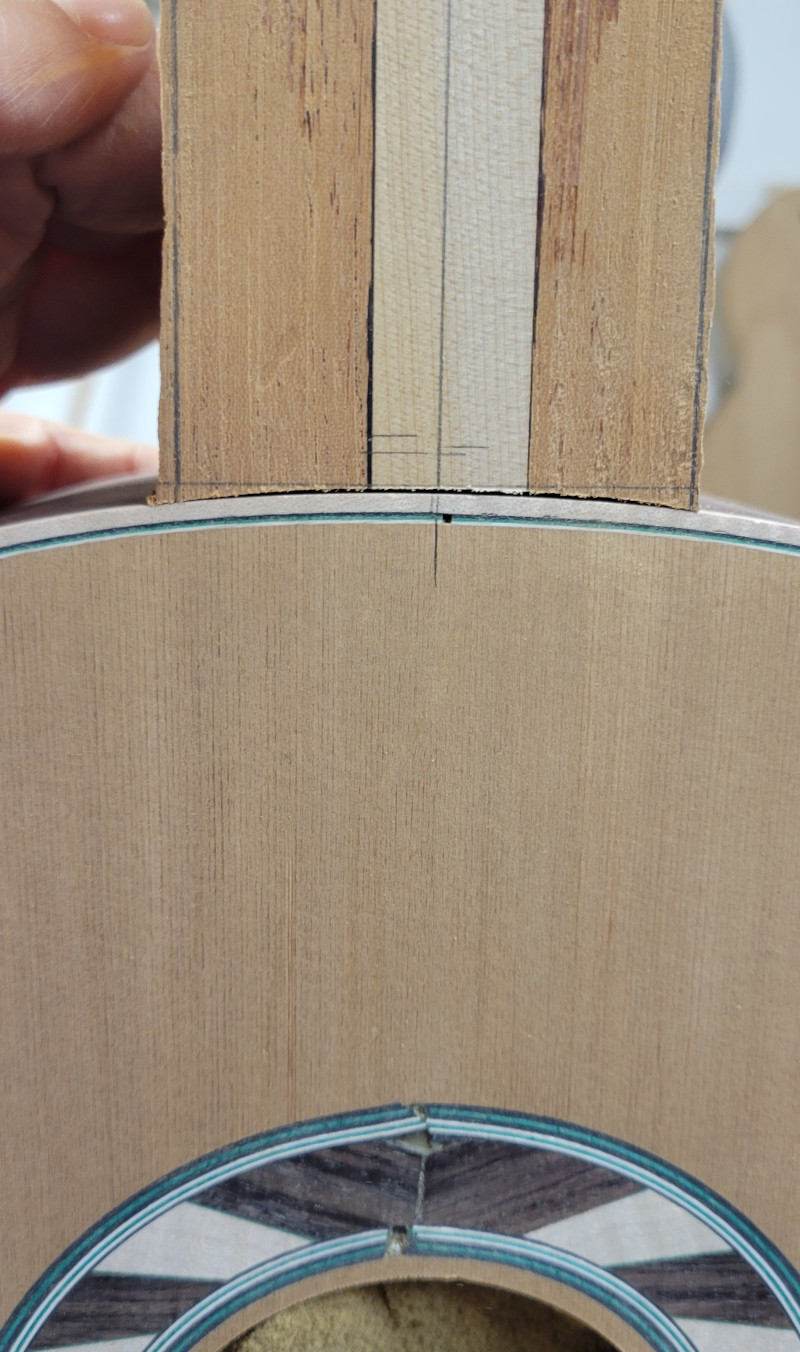
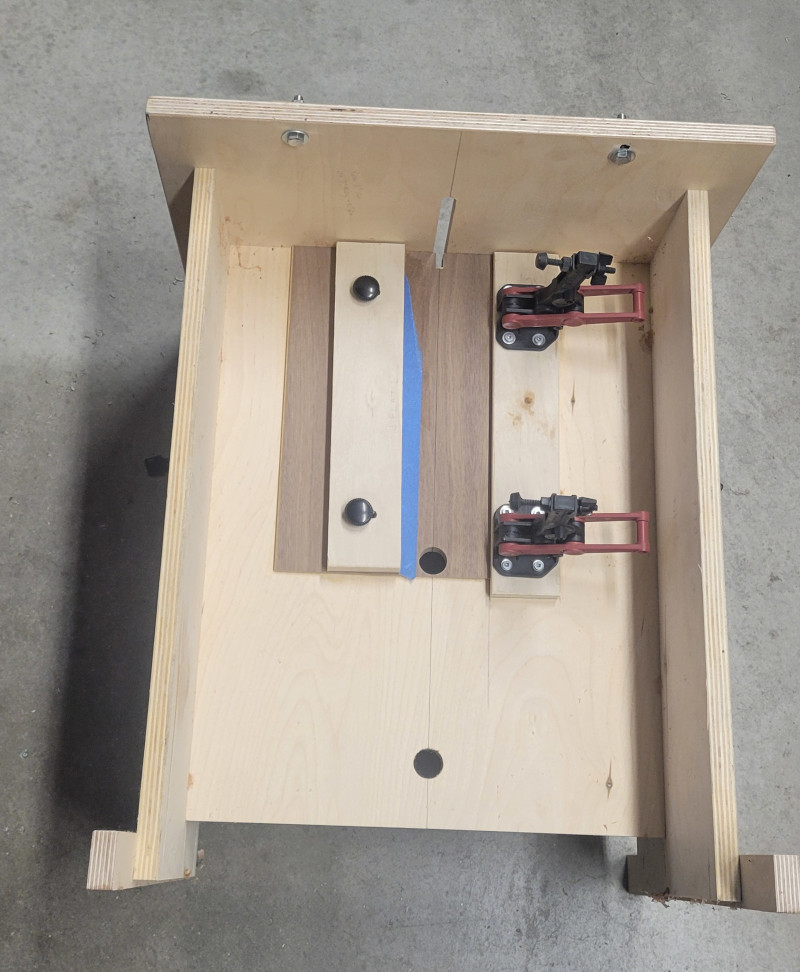
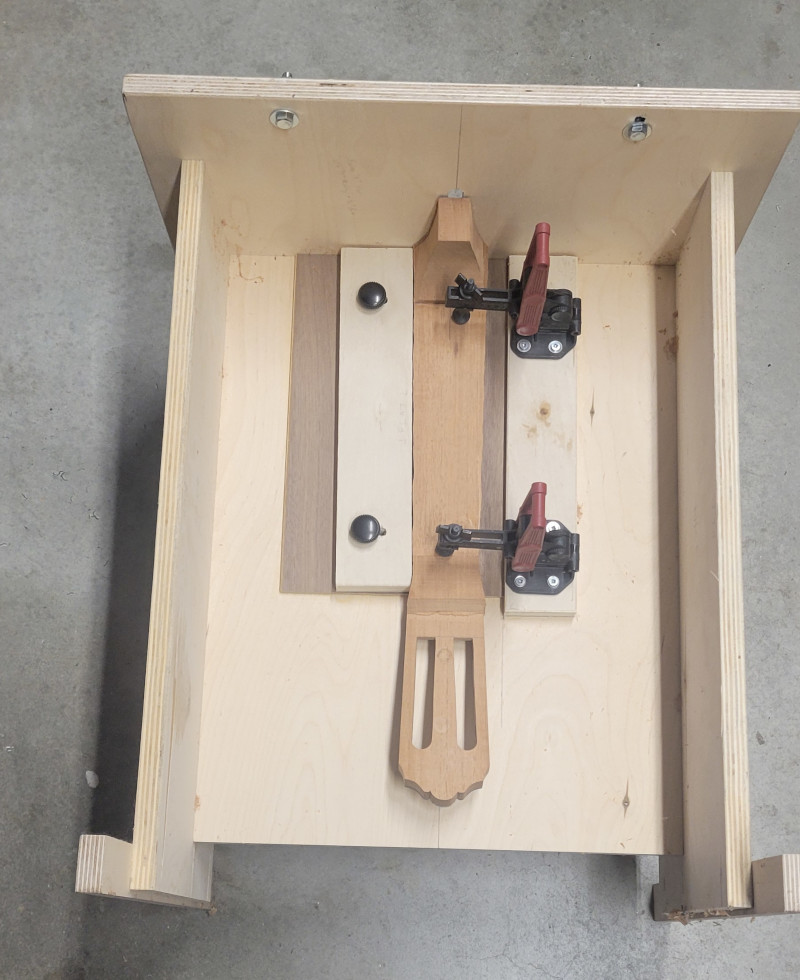
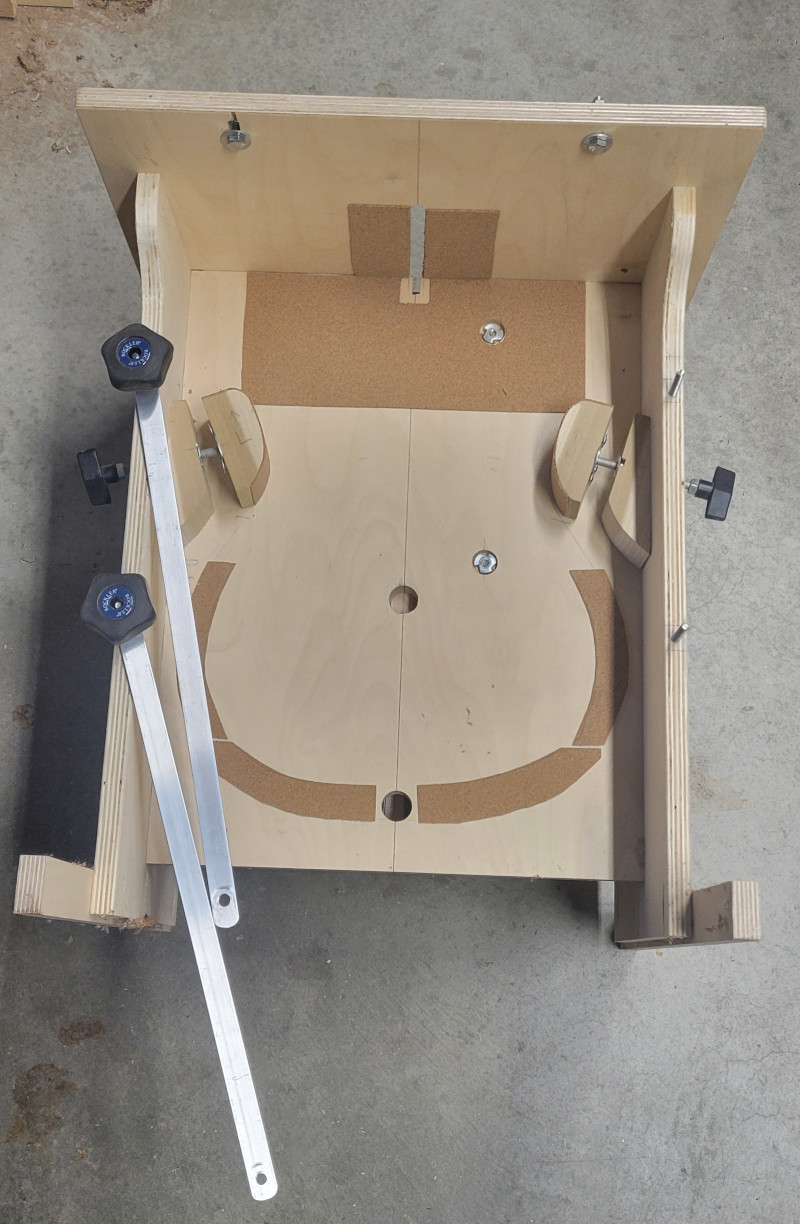
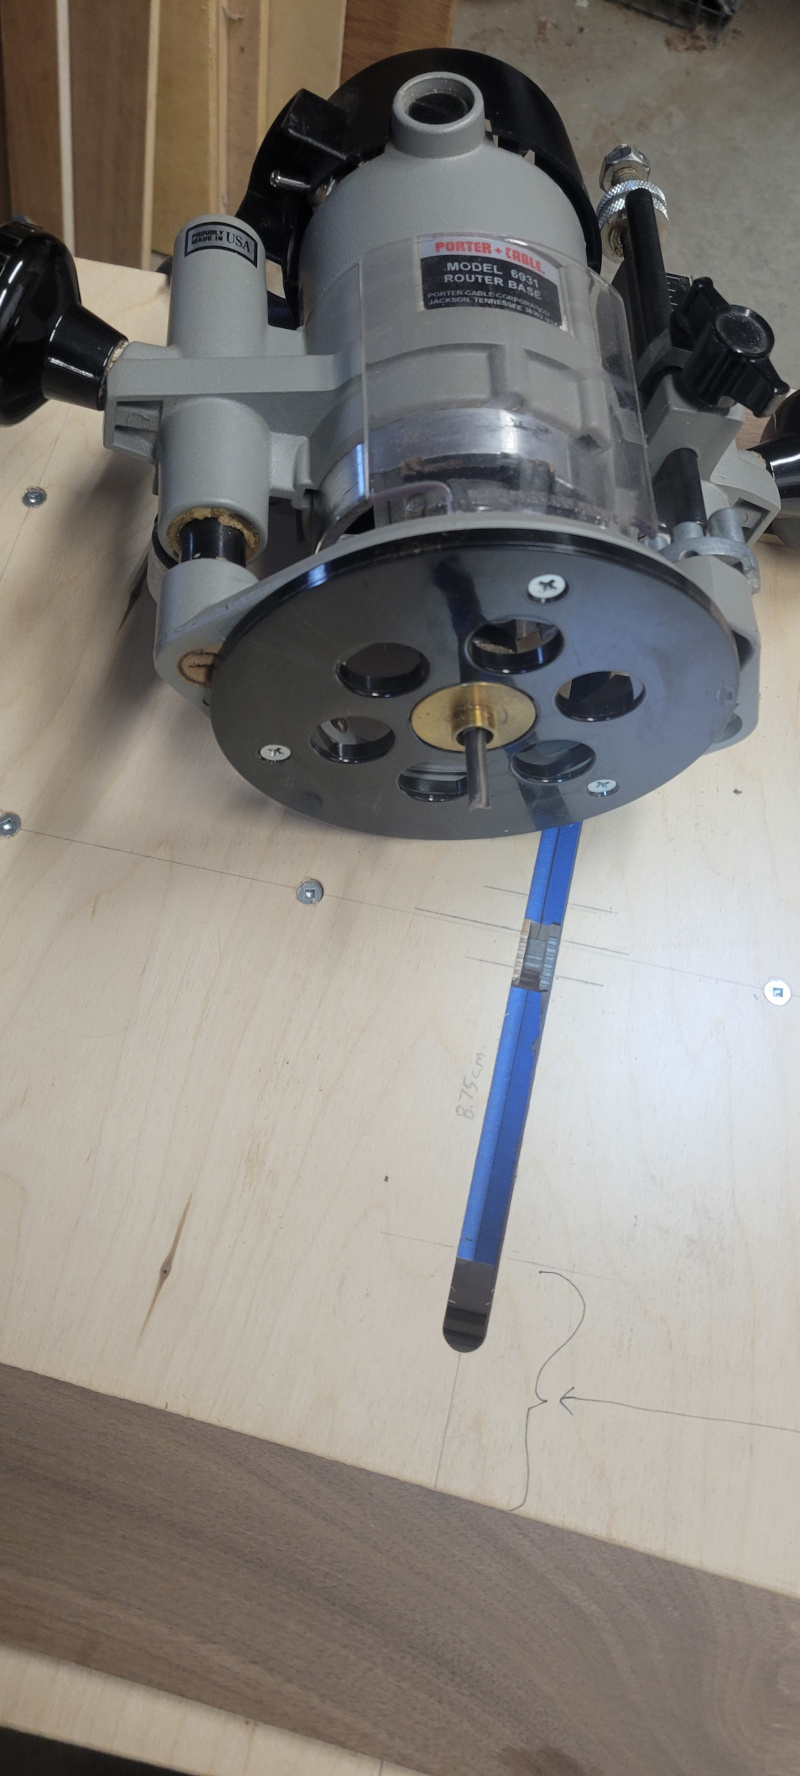
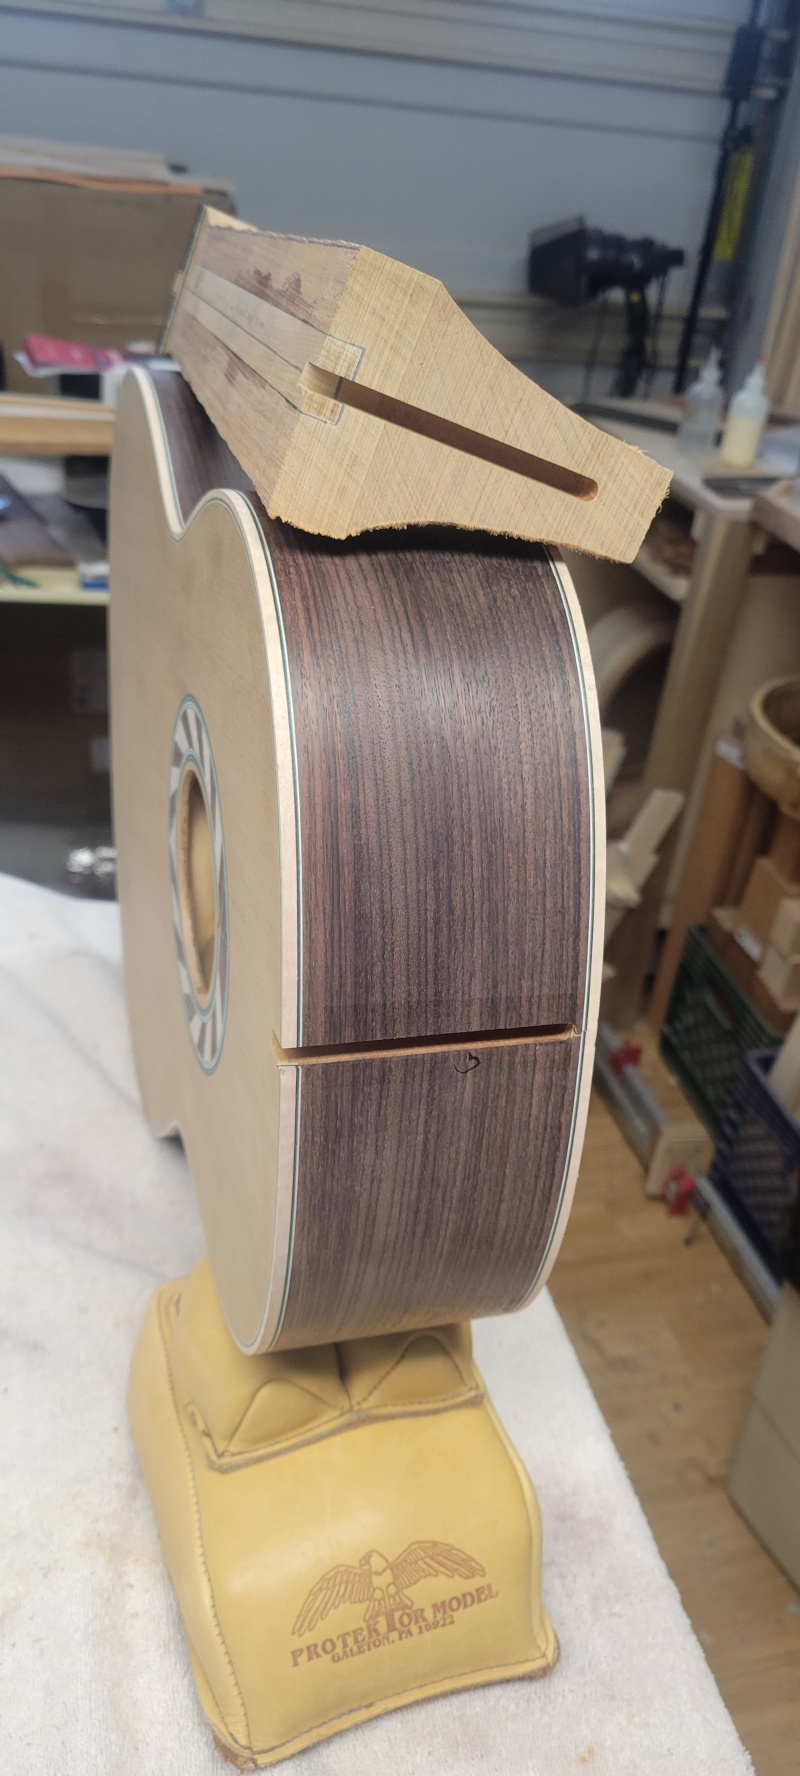
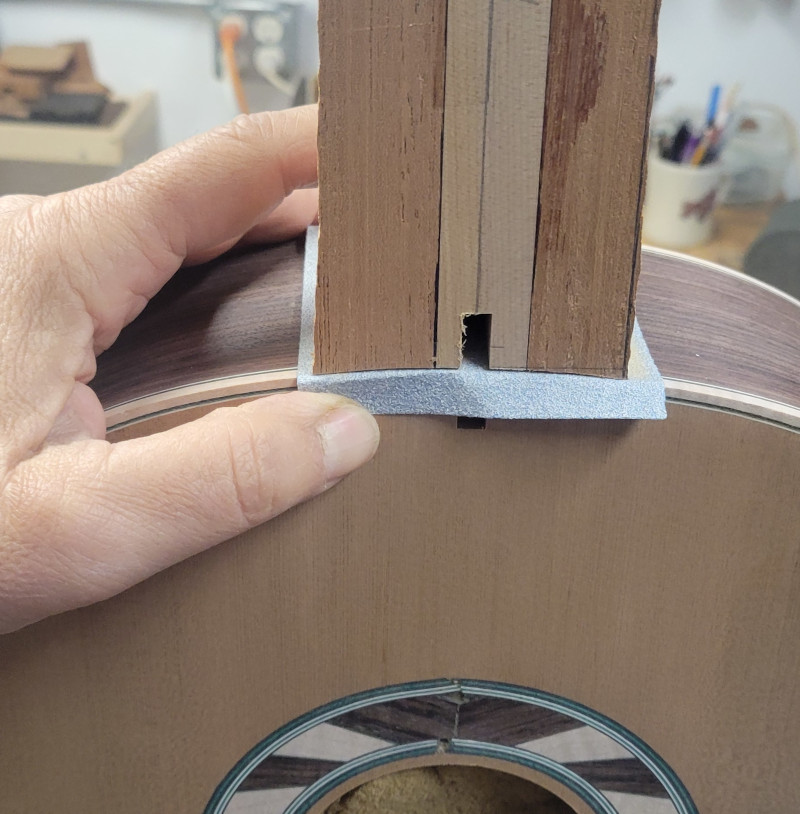
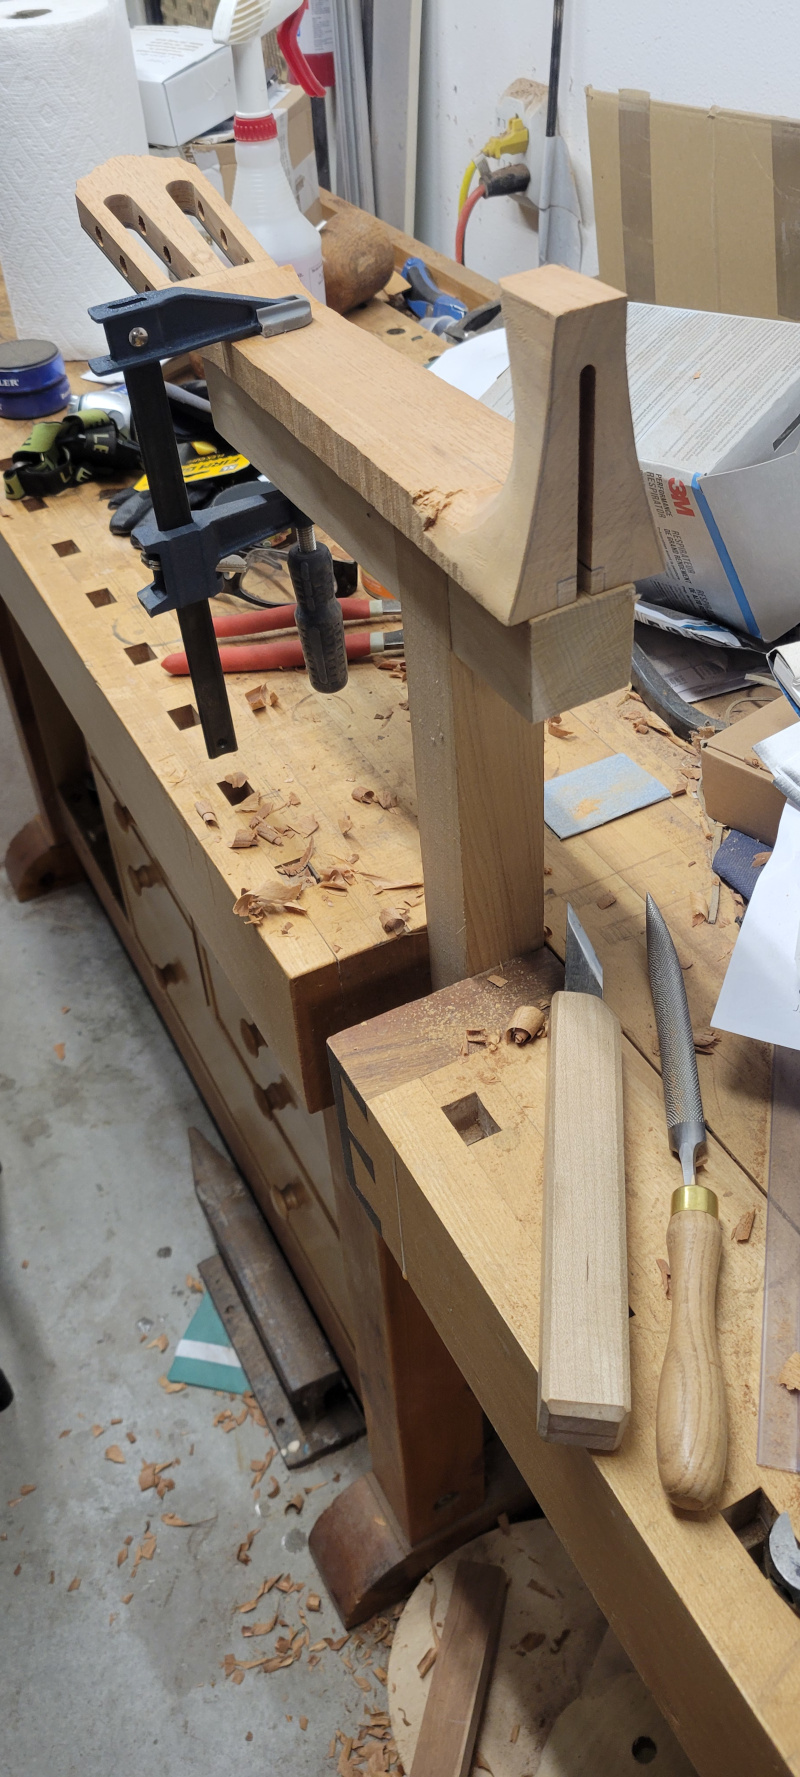
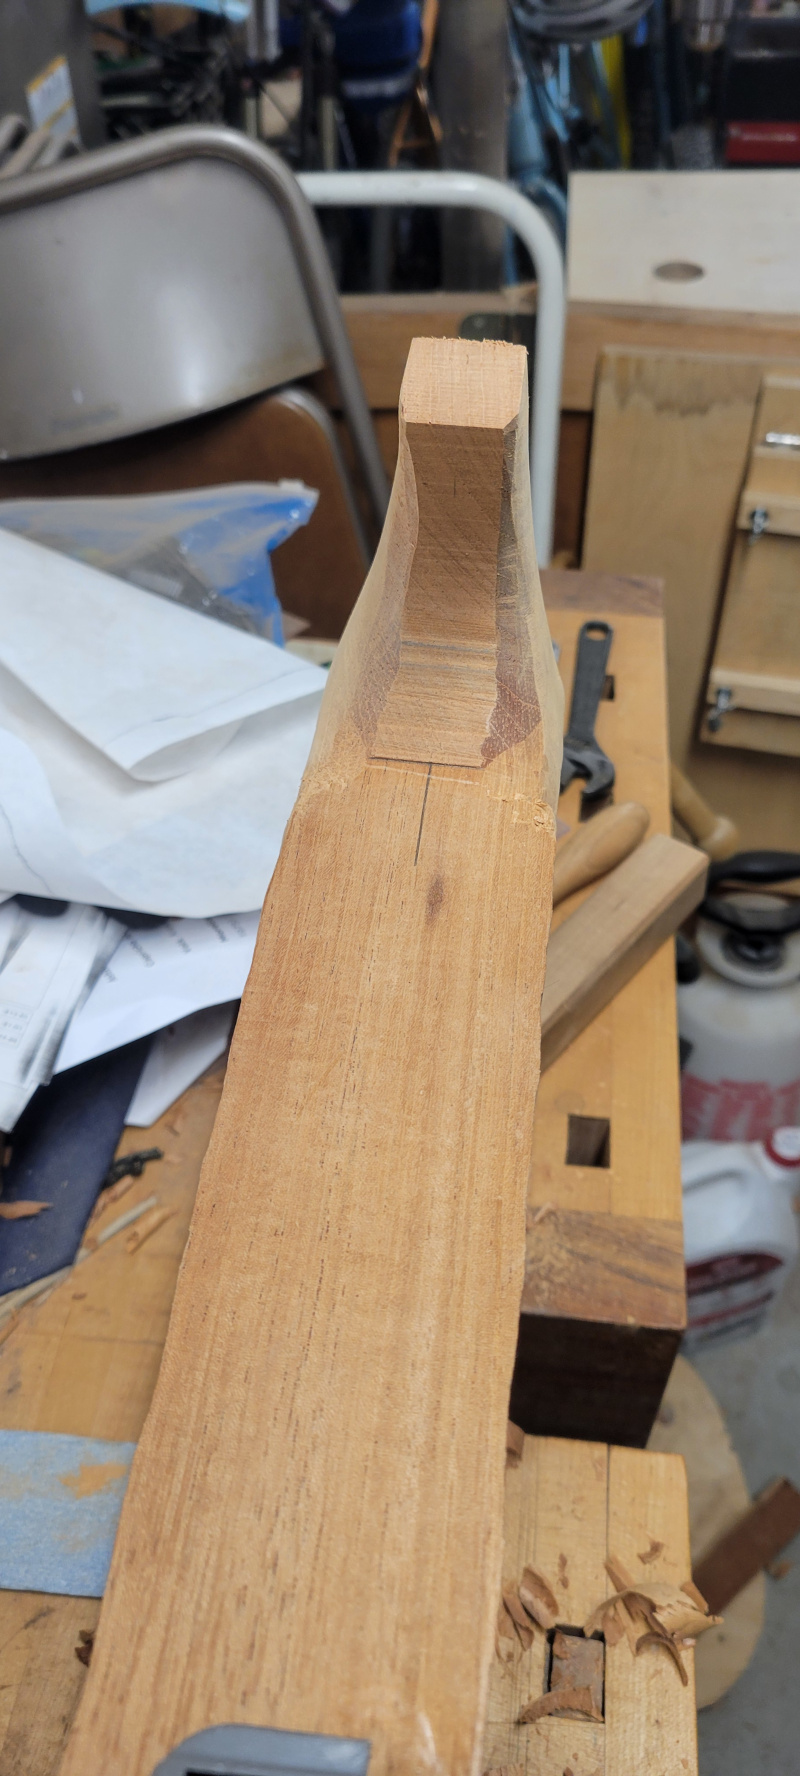
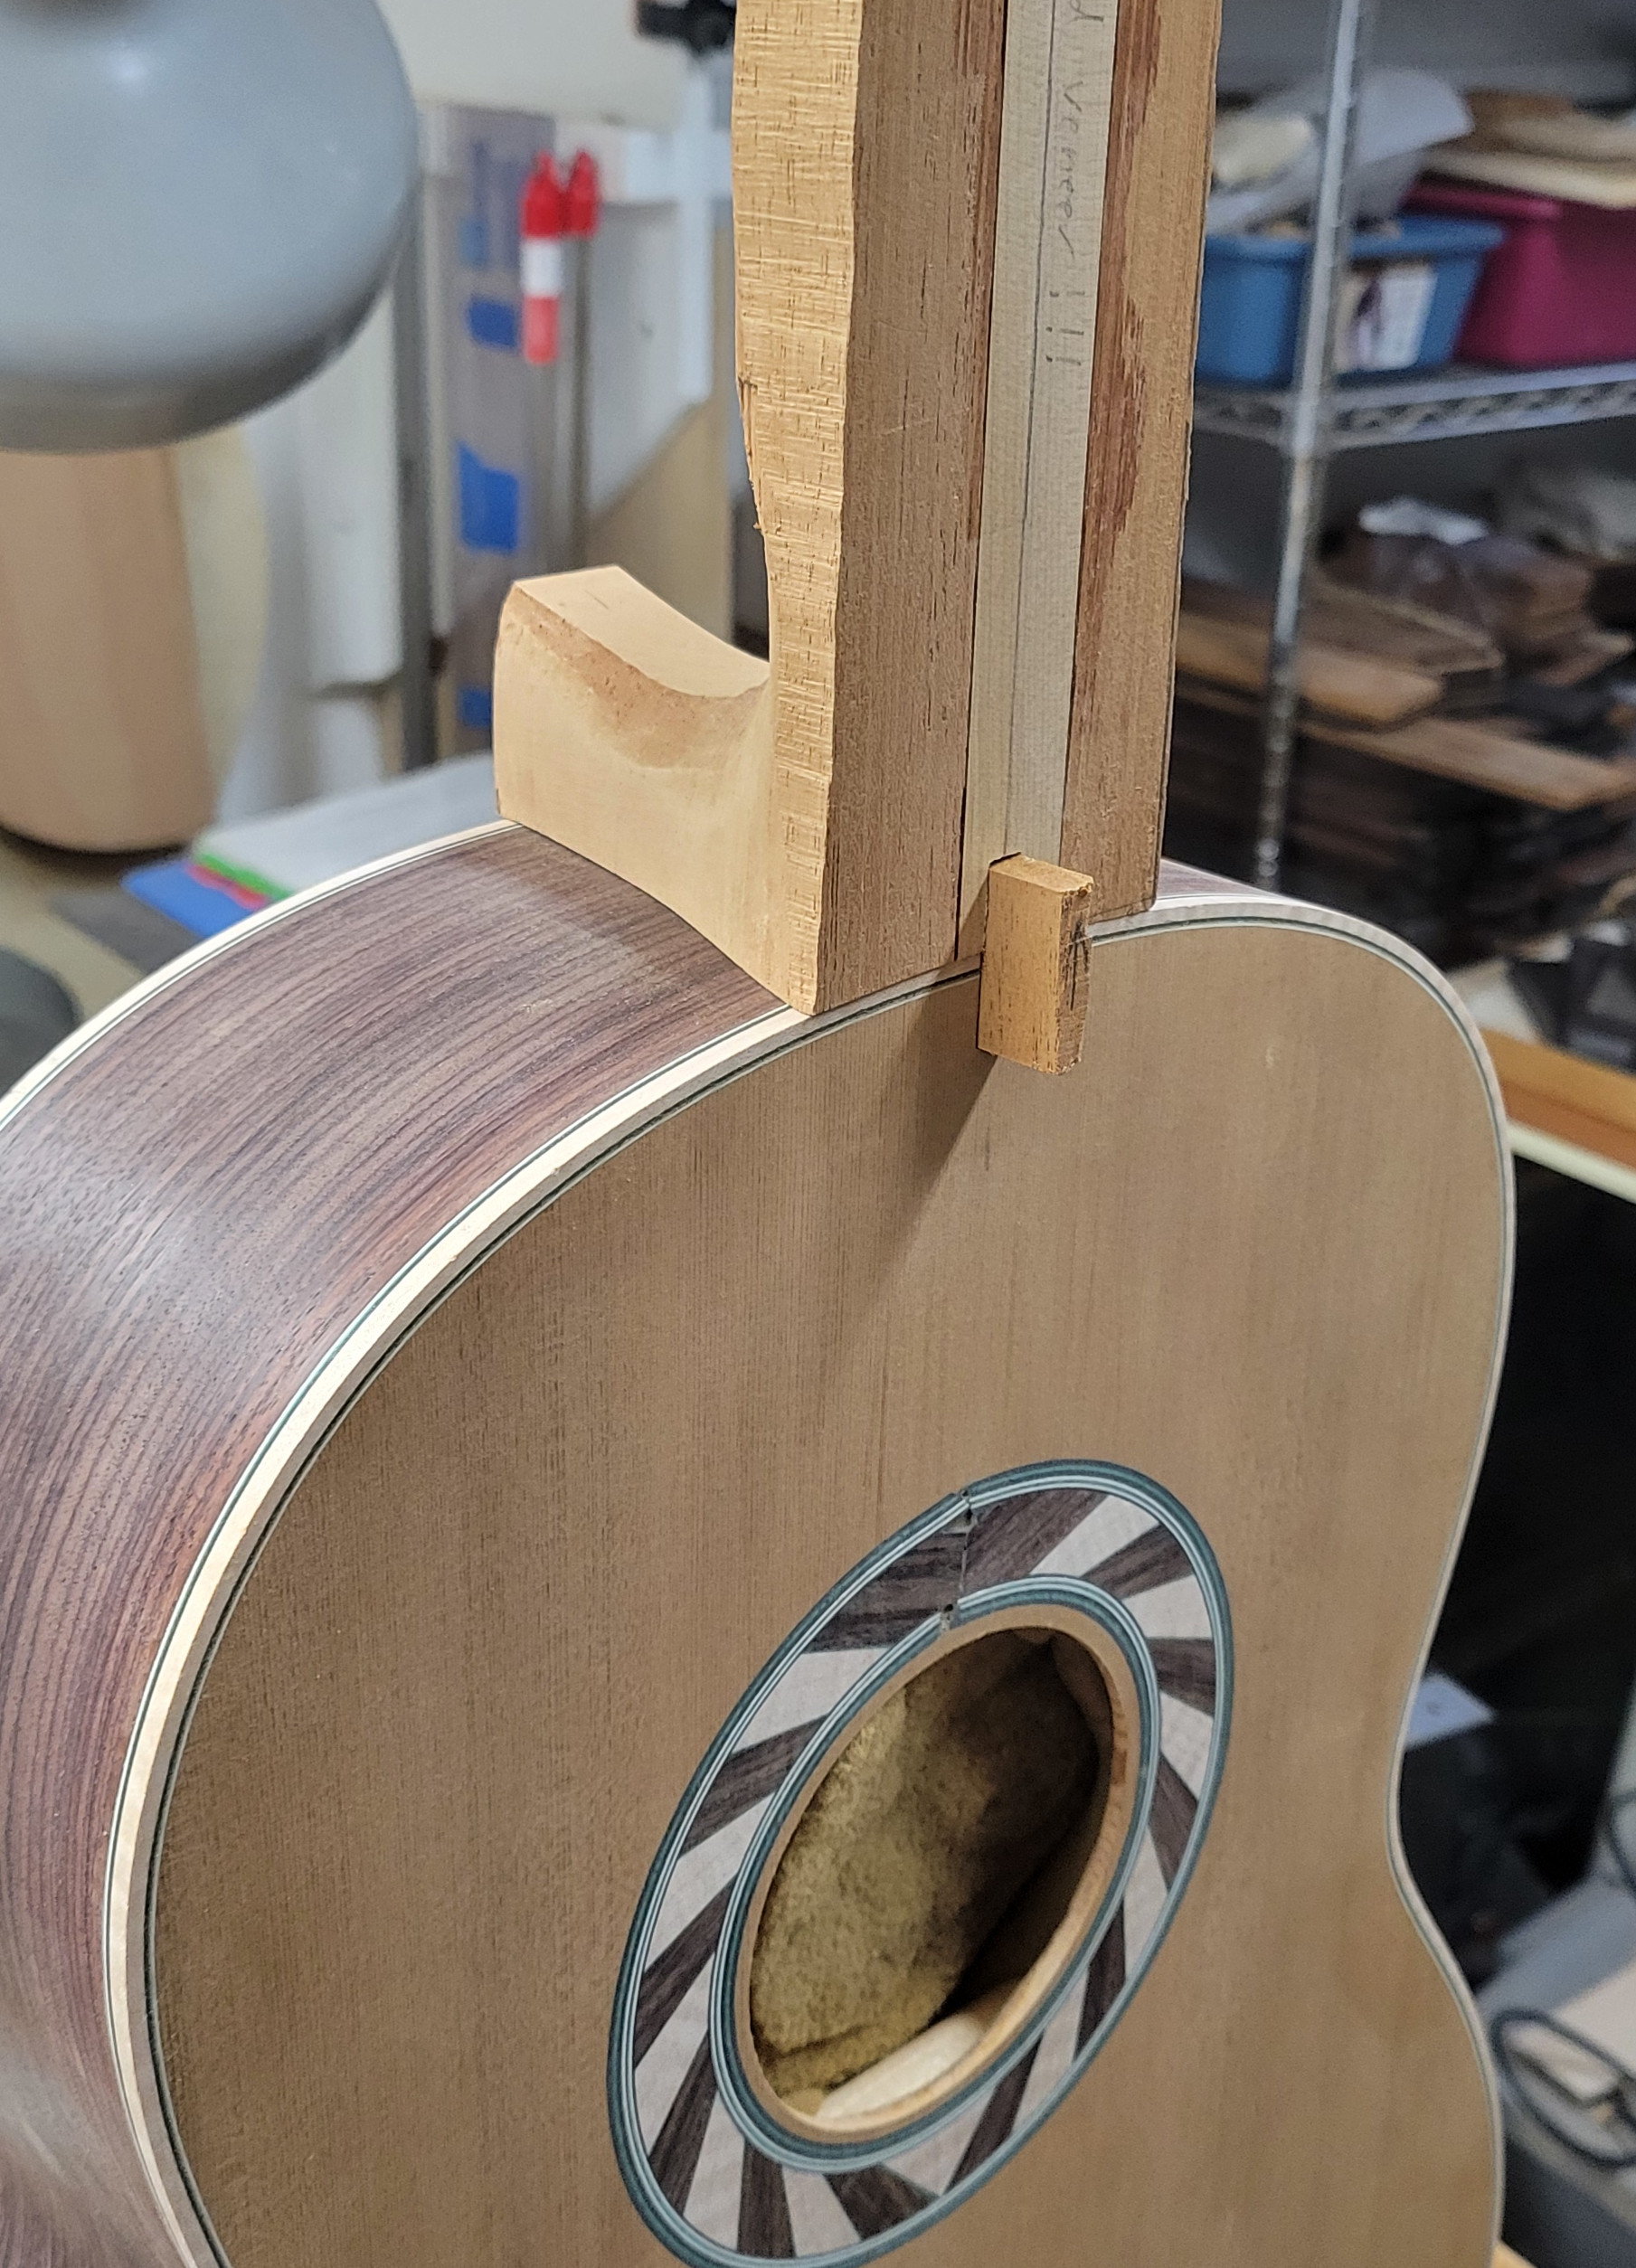
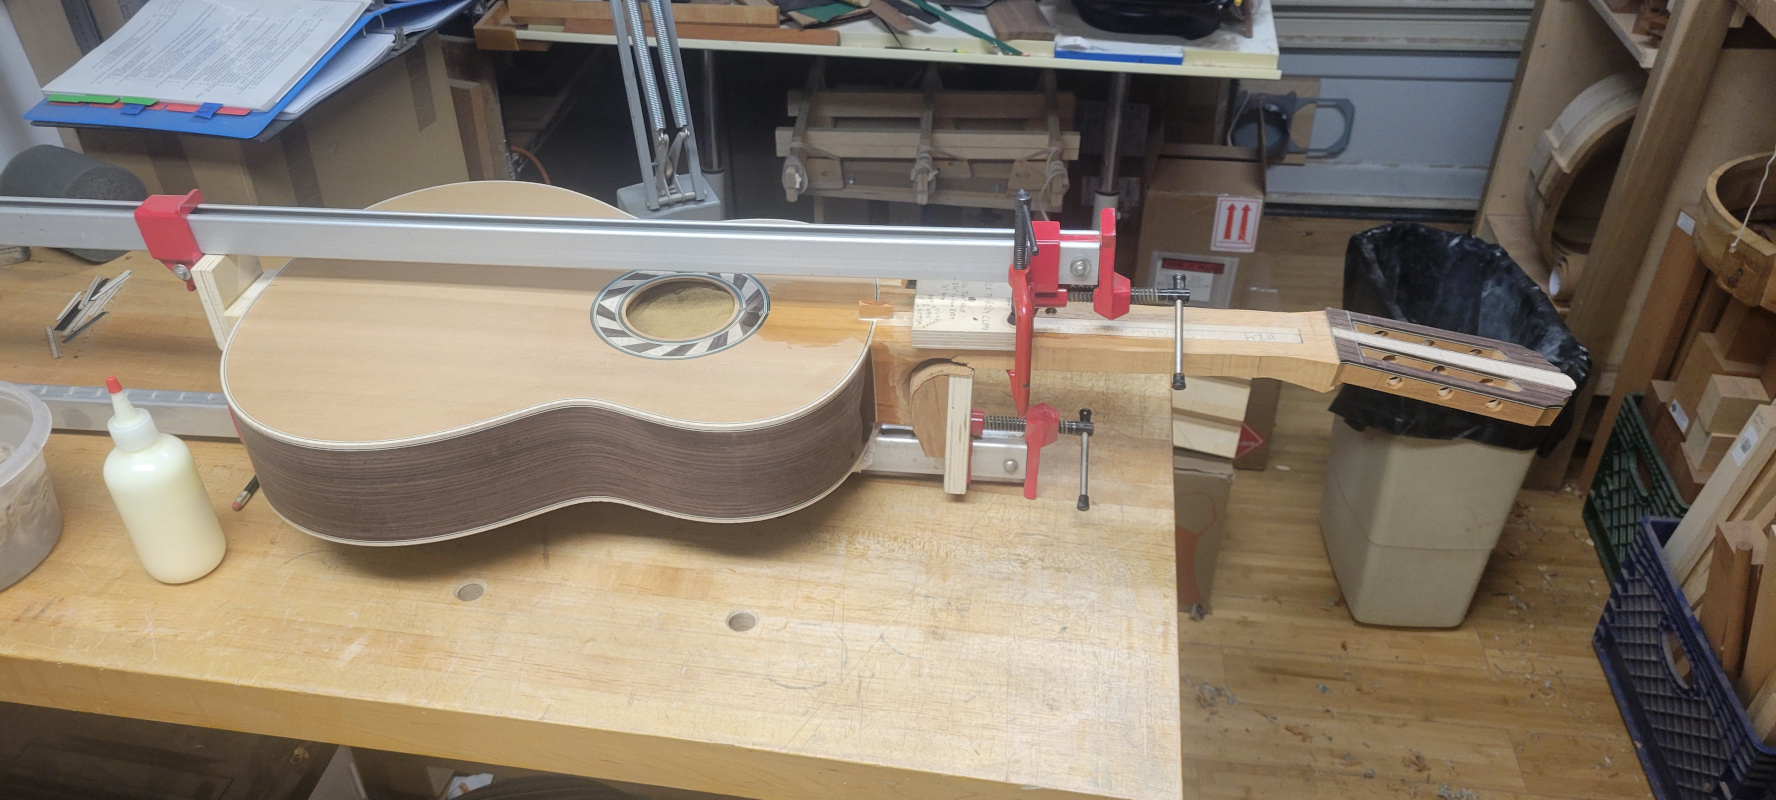
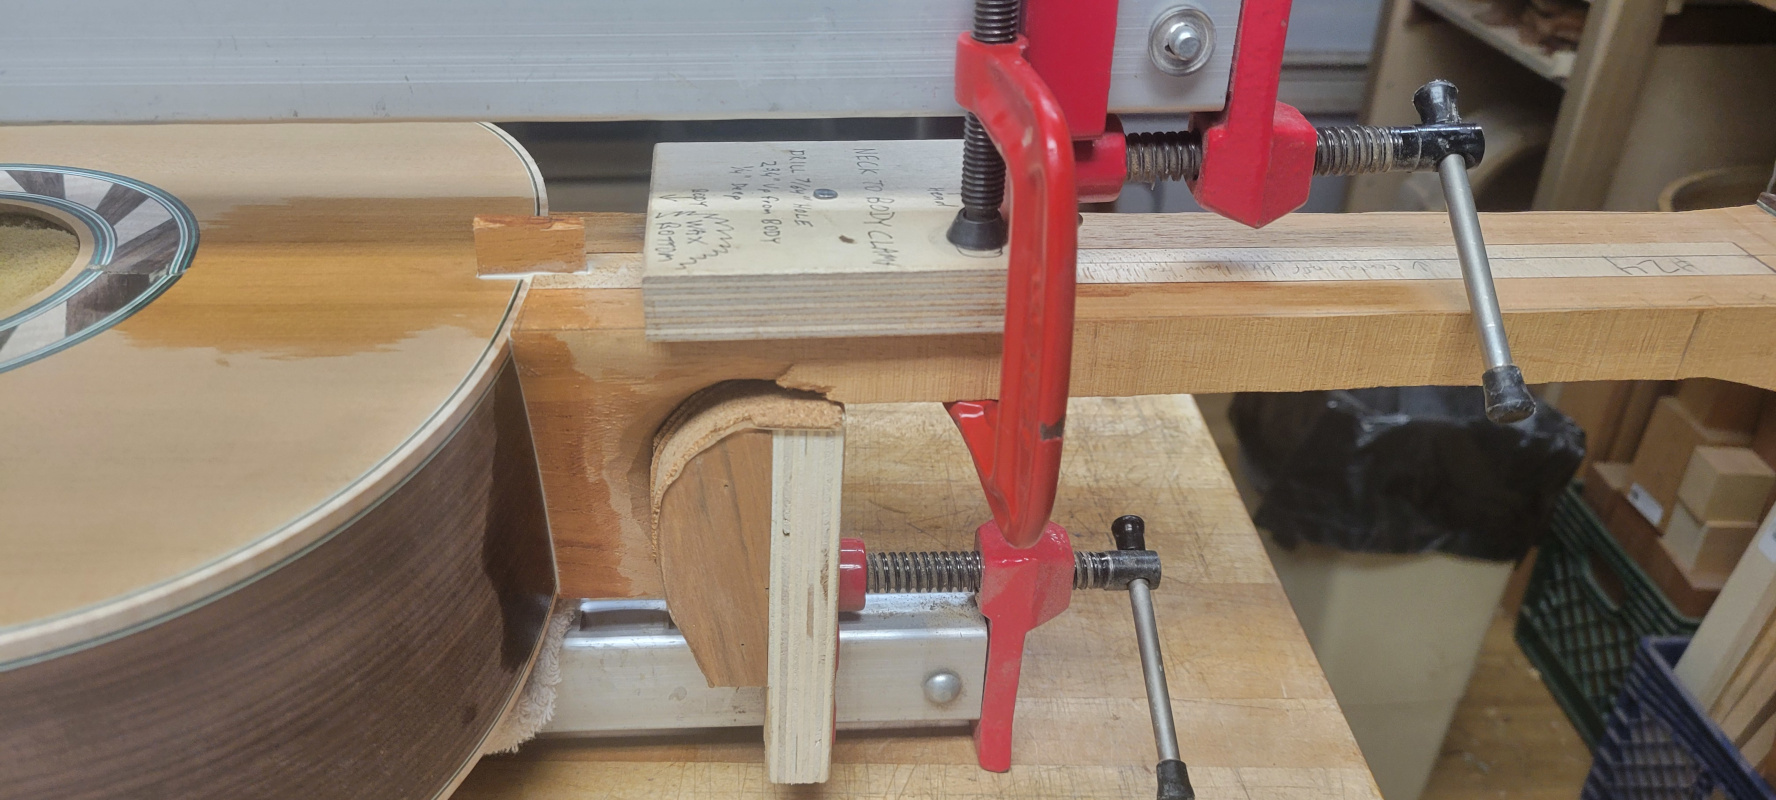
I attach blue tape to the guitar head and neck heel surfaces so I can strike a bold pen line directly down the centerline of each and perpendicular to the guitar top and fingerboard surfaces. Mark desired depth towards the back of the guitar so that the binding is not touched during the spline slot routing step below.I have a dual sided routing jig for the spline slot. One face holds the neck secure. Adjust alignment for the centerline of the neck to match the line on this jig, and hold neck down with toggle clamps. Add layers of blue tape along an edge of the neck if needed to get the centerline on the heel to match the routing slot centerline.Here’s the neck mounted in place. The board with the knobs is simply to adjust a stop so that you can place the board against a solid object on one side.The other face of the jig holds the body in place. Two diagonal knobs push the sides upwards so that the guitar is firmly pressed into the head end at the top of the jig. The two aluminum straps hold the guitar body in place. Again, centerline alignment is key to success.This is the top of the jig. A slot is just wide enough for a template collar mounted to a plunge router base. The bold pen centerlines drawn on neck and body are perfectly centered in the slot of the jig. The two darker boards are adjustable stops to make sure that the spline slot stops before the back binding, because popping the slot out the back would be very very bad.Porter cable plunge router with very long 1/4″ bit. The template collar is attached to the plunge router base. I route down 9/16″ into both the neck and the body, taking multiple passes each a bit deeper.The routed spline slotsThe worst step is this one. I use 100g sandpaper to fit the full face of the heel to the body. Keep checking the two alignments to make sure the neck still points in the correct alignment.Once the mating faces are cleanly sanded, rough carve the neck heel. It’s much easier now than when the neck is glued to the guitar. A Tee riser with a long nail is mounted in the bench vise. The nail goes into the spline slot, and a single clamp holds the head end to the jig. Carve to within 1/16″ of the desired heel shape. A sharp spear knife and a quality rasp make this a pretty quick job. Only profile the part that attaches to the guitar, as the rest of the heel should be left square shaped for ease in clamping the glue joint later. The rest of the neck carving will be after the neck is glued onto the guitar.Spline is created out of 1/4″ Spanish Cedar or mahogany. Grain runs in the same direction as the neck and heel block inside the guitar. This allows for seasonal movement without added stress to the joints. Verify that all joints all the way around this connection are tight and glue-ready. If not, clean it up further with sandpaper or files. Also, this is the last chance to triple check the neck alignments.Final glue up. I use Titebond I (red cap) for the open time on this joint. I used hot hide glue once, and it seized so quickly I could not get everything together fast enough. Two long bar clamps help hold this joint tight at both the top and the bottom of this joint. A close up of the joint. The block on the top of the neck is secured with a small nail and a clamp. That is used to hold the top of this joint tight. A custom caul was made for the heel curve to allow the bottom caul to hold the bottom of the joint tight. Clean up with wet rags as the glue squeeze out goes everywhere.